Looking to add a personal touch to your painting tools? Making your own paintbrush is a fun and rewarding project. Follow this step-by-step guide to create a custom paintbrush using simple materials. Let’s get started!
Materials You’ll Need:
Before you begin, gather the following materials:
- Wooden dowel or stick
- Scissors
- Strong adhesive or glue
- Rubber bands
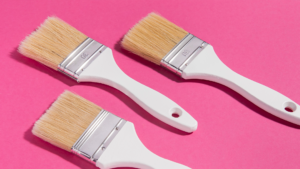
- Natural bristles or materials for bristles (sponge, feathers, or hair)
Step 1: Prepare the Handle
Start by preparing the handle of your paintbrush. Cut the wooden dowel to your desired length. This will serve as the handle of your brush. Once cut, sand the edges to ensure they are smooth and comfortable to hold.
Step 2: Create the Bristles
Next, gather your bristles. You can use natural materials like sponge pieces, feathers, or hair. Cut these bristles to a uniform length. This step ensures that your paintbrush will have an even and consistent texture when painting.
Step 3: Attach the Bristles
Now it’s time to attach the bristles to the handle. Apply a generous amount of strong adhesive to one end of the dowel. Arrange the bristles in a neat bundle and press them onto the adhesive. Secure the bristles with rubber bands to hold them in place while the glue dries. Allow the glue to dry completely to ensure a strong bond.
Step 4: Final Touches
Once the glue is dry, carefully remove the rubber bands. Trim any uneven bristles to give your paintbrush a neat and professional appearance. Your DIY paintbrush is now ready to use!
Enjoy Your DIY Paintbrush!
Congratulations! You’ve created your own custom paintbrush. This unique tool can add a special touch to your painting projects. For more DIY tips and tricks, like and subscribe to 5W Construction. Happy painting!